A year ago, Unity Technologies requested me to create this demo. It was a huge load of work but finally, it was worth the effort. This article digs into the details of the project.
Environment
The project went through different stages. It was first shown at the GPU Technology Conference in March ’14.

And I came up with this:

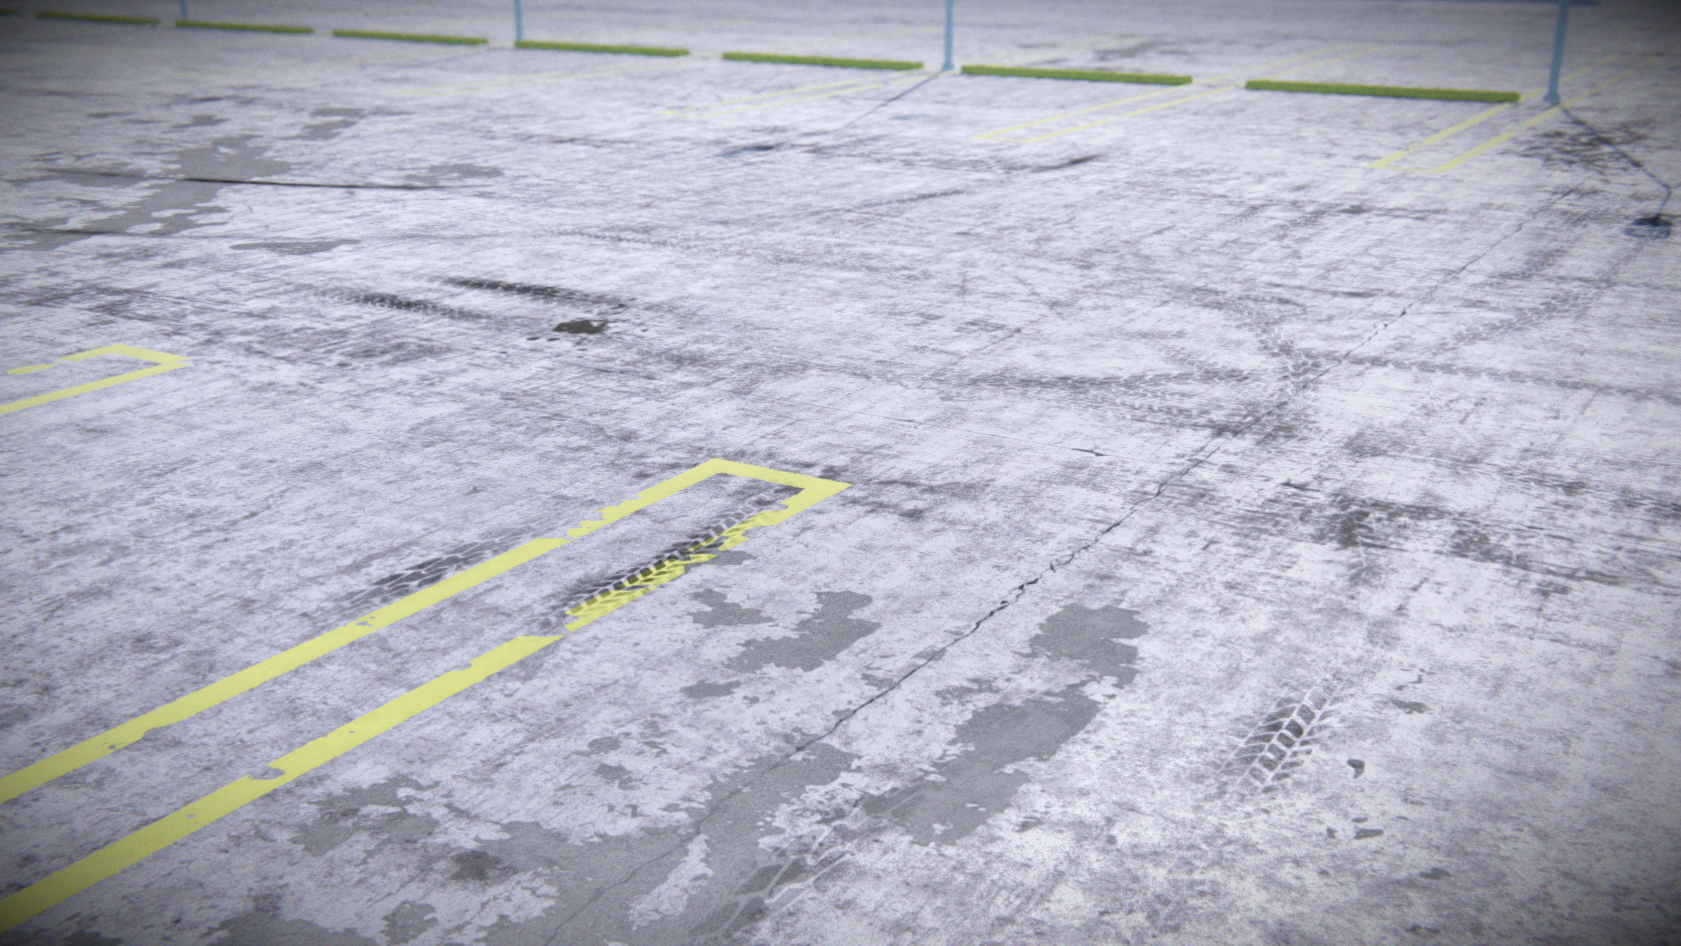

I thought that it would be a good idea to create some cracks with relief mapping, so I modelled a few cool shapes in zBrush in order to get a good depth map.
.png)

Another idea I came up with was the creation of a reflective floor. As it was a very rough surface, I added some extra magic to the Aras’ planar reflection script to blur the result.

Scene Manager
This demo allows you to switch between different lighting conditions and materials. Everything was planned to experience these changes in real-time and this involved managing skyboxes, lights, materials, atmosphere, ambient light and reflections.

As you can see here, there are some arrays where data is stored. Material list stores the preconfigured materials. Sky Lighs is a class that stores a directional light, Fog Volume, GUI thumbnail, skybox & convolved skybox.

This data is read every time you clic over the GUI images so the new lighting conditions are set.
Some other stuff, such as Tonemapping and skybox exposure, is controlled by the Material Switcher script. The script’s name doesn't match at all with its functionality, does it ? ;)
Lighting
- Sky: I used the AllSky package for the skybox as well as Fog Volume to add some atmosphere.
- Dynamic reflections: Unity 5 has a new method to capture HDR longitude-latitude maps in real-time called "Reflection Probe". It is quite easy to use since they have included shader macros that make its usage straightforward.

- Static Reflections: Unity 5 is able to convolve HDR L-L cubemaps taking care about edges and mipmaps. This method was used for reflections before "Reflection Probes" were implemented.

- Car GI: The guys of Unity provided me with a script to switch between different skyboxes. It also had a magic function to compute Spherical Harmonics from a given skybox.
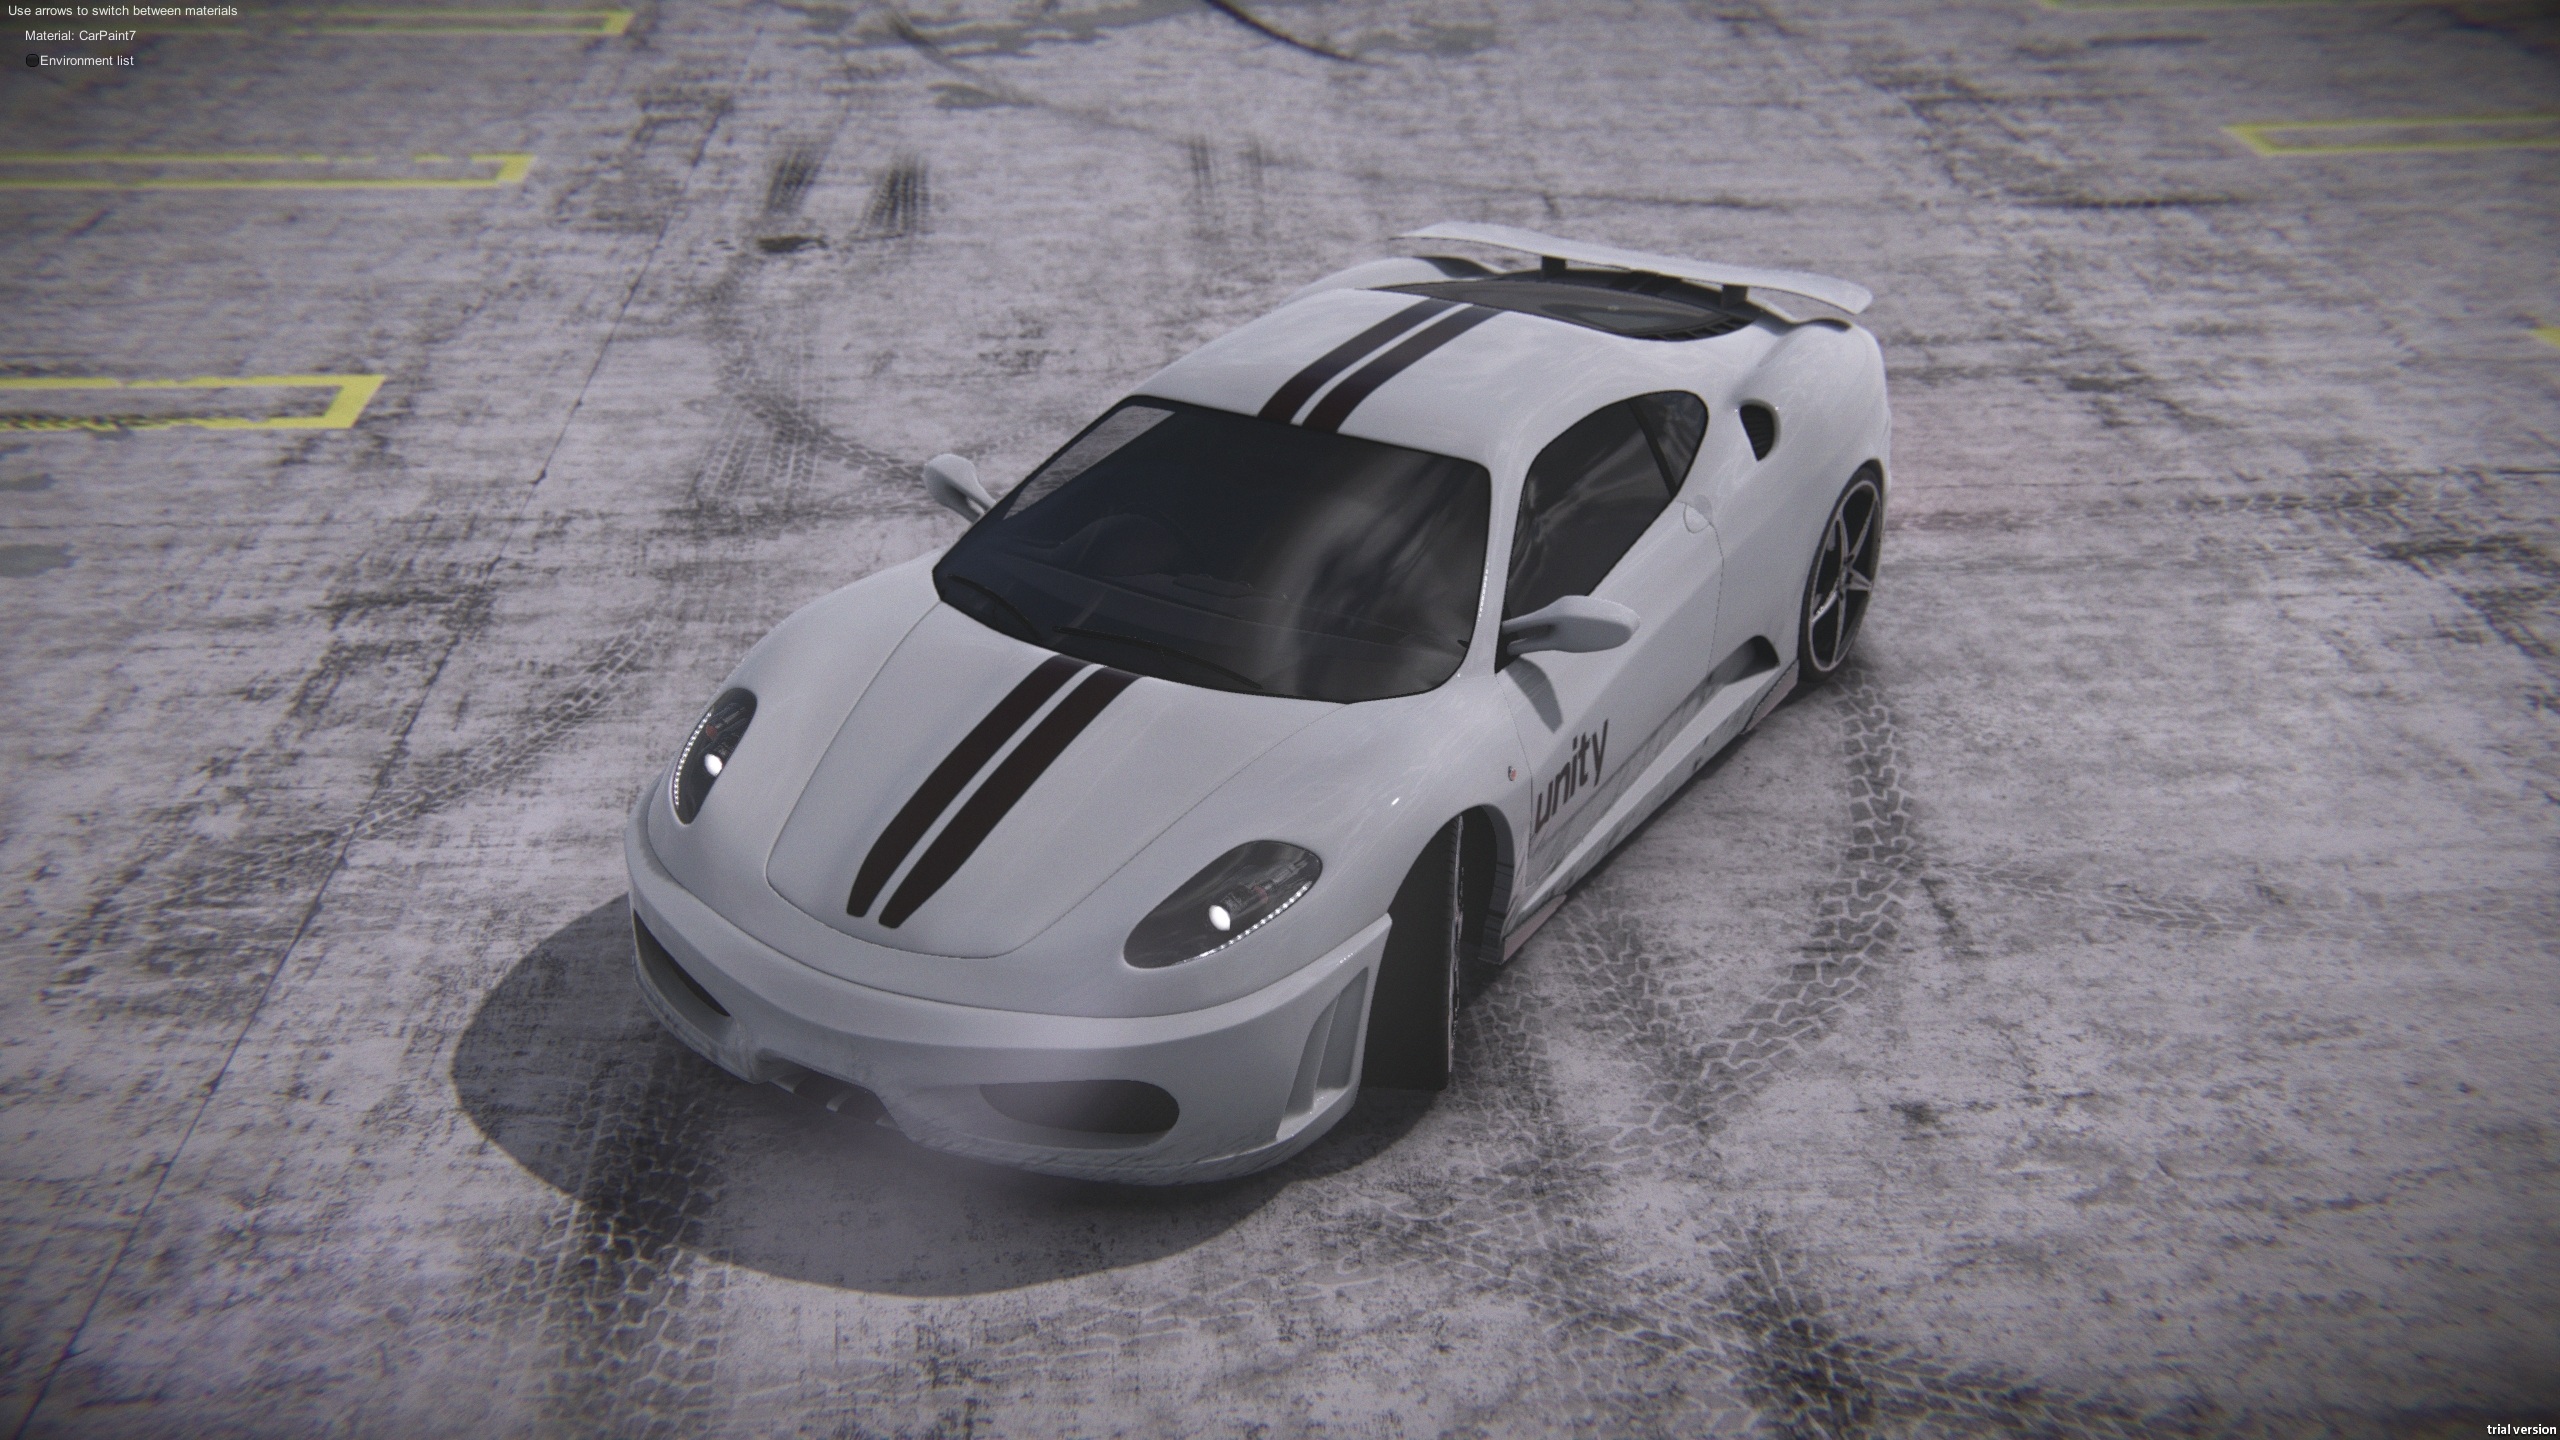
Car model
We started with a very rough version of the car that Luis Carrera made some years ago. We decided to hire him to polish the model, and he did a very nice job indeed. After we delivered the garage demo for the GTC, we stopped the project for a while and I got back on my skin renderer to build a demo for eisko guys.
Once that the skin rendering demo was finished, I went back to the car project, but this time without Luis. He had been hired by another company, so I had to find a new partner. I decided to bring Fredo to this project. He is the perfect mercenary, fast and clean.
I asked him to remake several parts of the car: engine, wheels, brakes, exhausts, and some bodywork. He did an awesome work there. I immediately fell in love with it.


Car shader
The shader was the first thing I did. I made a demo scene where I was able to switch between different lighting conditions and materials. I tried to test every possible situation so I made many different materials with it.
Car lights
Here comes another interesting detail: I tried to simulate how light travels along lamps according to how they are built. I had to write several shaders for this, one for each piece of plastic with their own behaviour.

They are fully functional, so you can turn them on and off in real-time.


Headlights are using a cookie texture to break the light shape as if refracting.

They are fully functional, so you can turn them on and off in real-time.
I have also added a sort of fake volumetric effect to the headlights to emphasize the light beam.
Headlights are using a cookie texture to break the light shape as if refracting.
Post-process
Most of them are built-in image effects. I use Lens Dirtiness and Camera Lens, which is a crazy complex thing I did that computes physically correct optical dispersion based on glass composition. But that is another story.

Gallery


Free download package?
ResponderEliminarThanks for sharing a nice information.
ResponderEliminarrendering a wall
best acrylic render finish